


Konsta UI & Framework7
讓我們看看如何將 Konsta UI Vue 元件與 Framework7 Vue 一起使用。
建立 Framework7 專案
首先,使用 Framework7 CLI 建立一個 Framework7 Vue 專案
安裝 Tailwind CSS & Konsta UI
現在在建立的 Framework7 專案中,我們需要安裝 Tailwind CSS & Konsta UI
npm i tailwindcss konsta
專案根目錄中有一個 postcss.config.js 檔案,我們需要在那裡加入 tailwindcss 外掛
module.exports = {
  plugins: {
    tailwindcss: {}, // <- add this
    'postcss-preset-env': {},
  },
};
建立 tailwind.config.js 檔案並將其加入專案根目錄資料夾中,內容如下
const konstaConfig = require('konsta/config');

module.exports = konstaConfig({
  content: ['./src/**/*.{js,jsx,ts,tsx,vue}', './src/index.html'],
  darkMode: 'class',
});
將 Tailwind CSS 加入您的應用程式樣式。在您的 src/css/app.[css|scss|less] 開頭加入以下程式碼
@tailwind base;
@tailwind components;
@tailwind utilities;
KonstaProvider
現在我們需要設定 KonstaProvider,以便我們可以設定一些全域參數 (例如 theme)。
我們需要用 KonstaProvider 包裹主要的 Framework7 App 元件,在 src/components/app.vue 中
<template>
  <!-- Wrap Framework7's App with KonstaProvider with theme="parent" -->
  <k-provider theme="parent">
    <f7-app v-bind="f7params"> ... </f7-app>
  </k-provider>
</template>
<script>
  import { konstaProvider } from 'konsta/vue';
  import { f7App /* ... */ } from 'framework7-vue';

  export default {
    components: {
      konstaProvider,
      f7App,
    },
    setup() {
      const f7params = {
        theme: 'ios',
        // ...
      };

      return {
        f7params,
      };
    },
  };
</script>
使用方式
Framework7 有非常強大且靈活的路由,為了使其正常運作,我們需要使用來自 Framework7 的路由相關元件:App、View、Page、Navbar、Toolbar。
其餘的元件 (如果有 Konsta UI 的替代方案) 可以從 Konsta UI (konsta/vue) 中取得
範例頁面
現在一切都設定完成,我們可以在 Framework7 頁面元件中使用 Konsta UI Vue 元件。
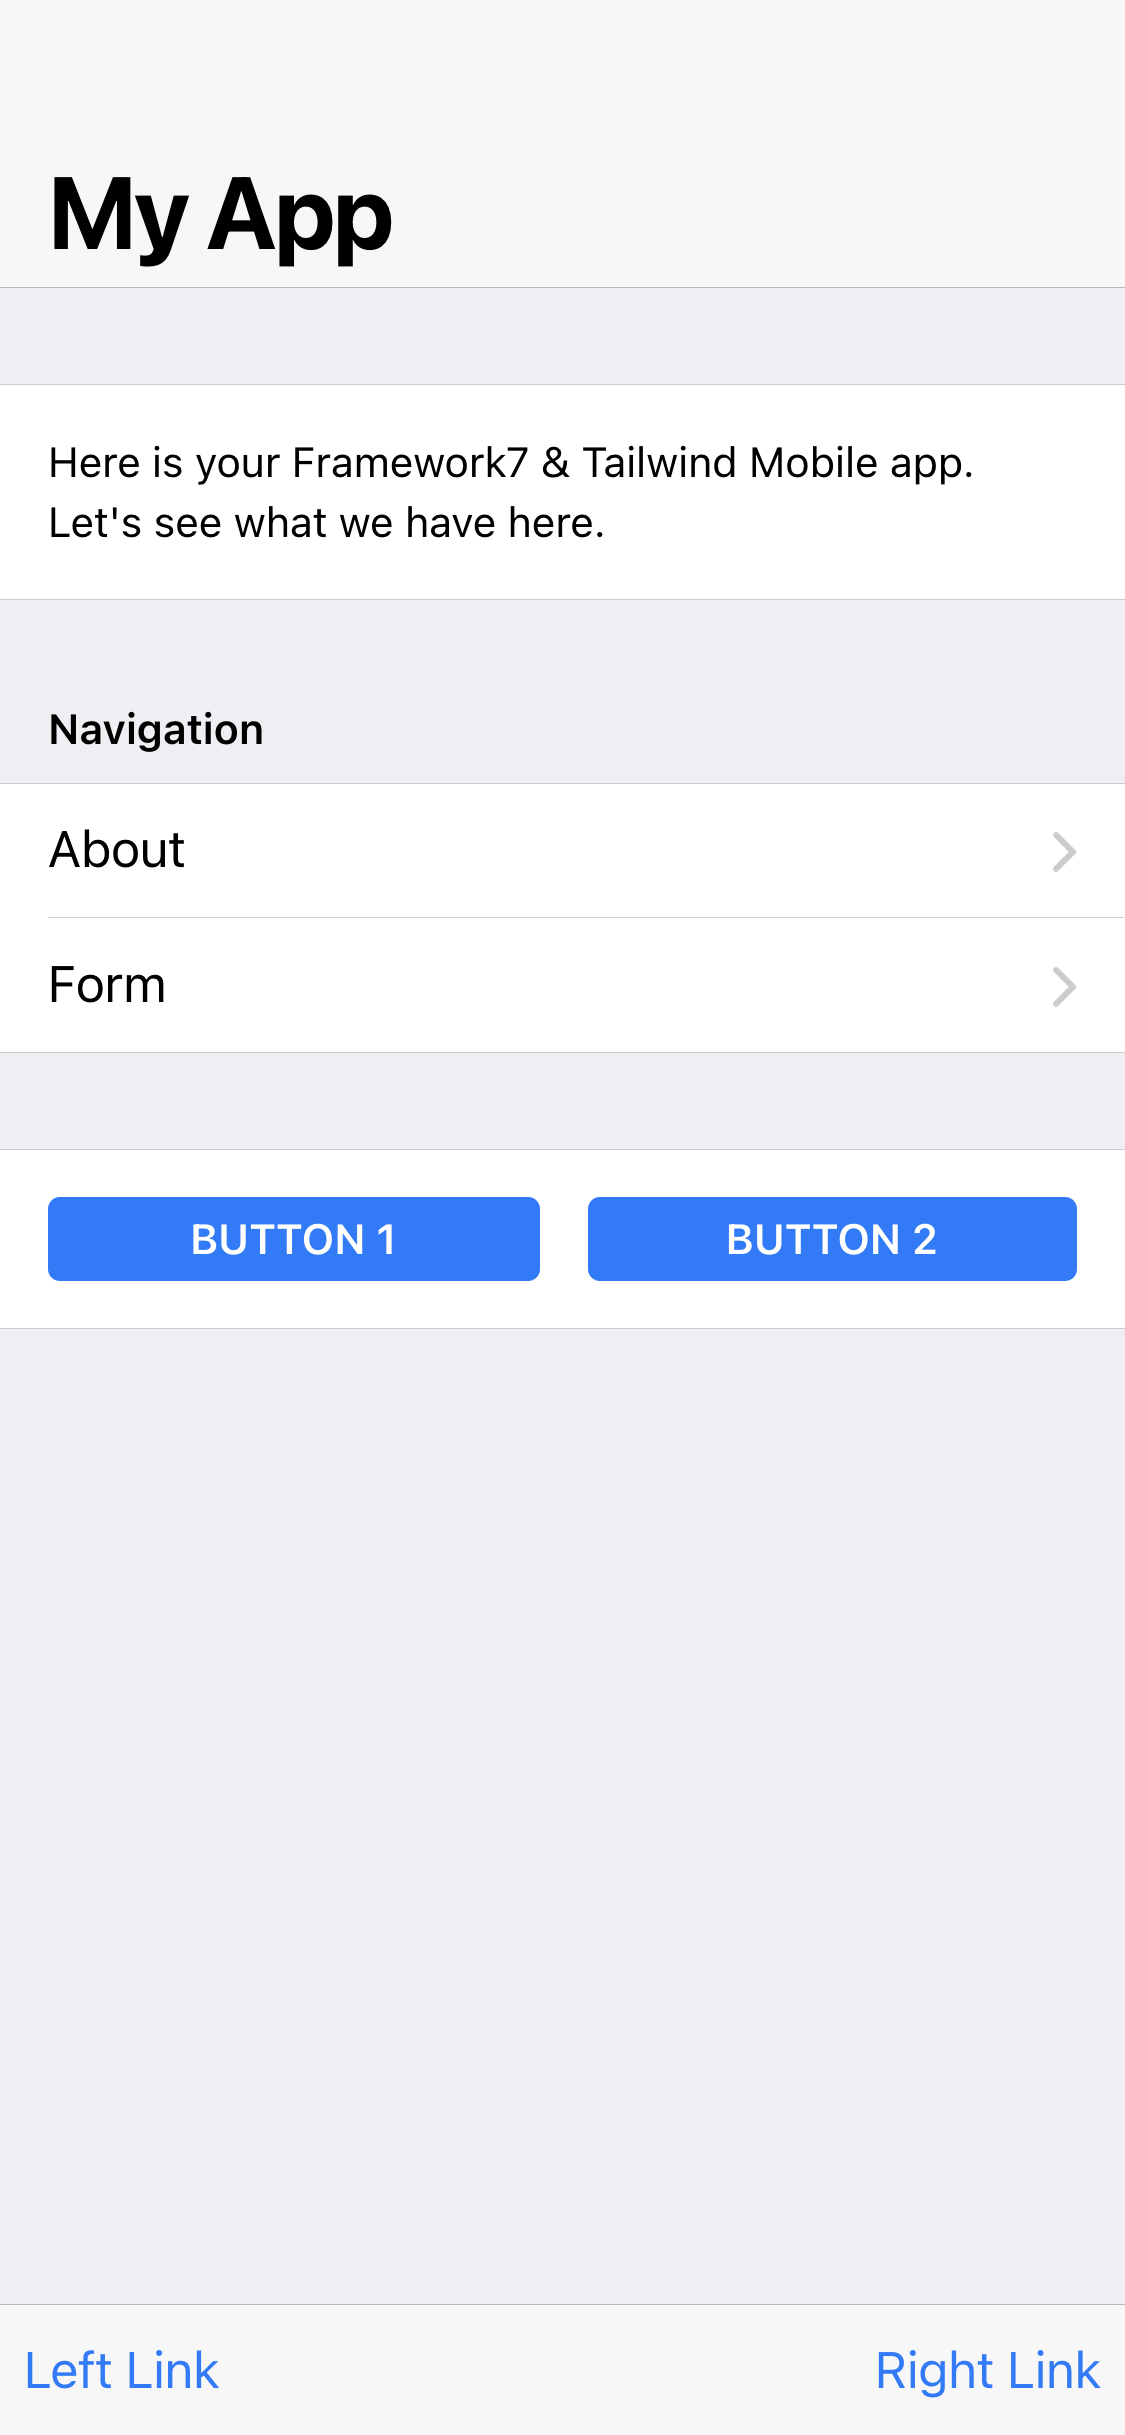
例如,讓我們開啟 src/pages/home.vue 並將其變更為以下內容
<template>
  <!-- Use Page, Navbar & Toolbar from Framework7 -->
  <f7-page name="home">
    <f7-navbar title="My App" large />
    <f7-toolbar bottom>
      <k-link toolbar>Left Link</k-link>
      <k-link toolbar>Right Link</k-link>
    </f7-toolbar>
    <!-- In page content we can use Konsta UI components -->
    <k-block strong>
      <p>
        Here is your Framework7 & Konsta UI app. Let's see what we have here.
      </p>
    </k-block>
    <k-block-title>Navigation</k-block-title>
    <k-list>
      <k-list-item href="/about/" title="About" />
      <k-list-item href="/form/" title="Form" />
    </k-list>

    <k-block strong class="flex space-x-4">
      <k-button>Button 1</k-button>
      <k-button>Button 2</k-button>
    </k-block>
  </f7-page>
</template>
<script>
  // Use Page, Navbar, Toolbar from Framework7
  import { f7Page, f7Navbar, f7Toolbar } from 'framework7-vue';
  // Konsta UI components
  import {
    kBlock,
    kButton,
    kList,
    kListItem,
    kLink,
    kBlockTitle,
  } from 'konsta/vue';

  export default {
    components: {
      f7Page,
      f7Navbar,
      f7Toolbar,
      kBlock,
      kButton,
      kList,
      kListItem,
      kLink,
      kBlockTitle,
    },
  };
</script>
結果我們應該會看到以下頁面
深色模式
請注意,Tailwind CSS 需要加入 dark 類別才能啟用深色模式,而 Framework7 (版本 6) 則需要 theme-dark 類別。Framework7 版本 7 的深色模式也需要相同的 dark 類別。
因此,如果您使用深色模式,請確保在根元素上設定/移除 dark theme-dark 類別 (最好是在 <html> 元素上)。
色彩主題
Framework7 和 Konsta UI 使用不同的來源來取得主要主題顏色。雖然 Framework7 的主題顏色是透過 CSS 自訂屬性配置,但 Konsta UI 主題應在 tailwind.config.js 中設定。
| 顏色 | Framework7 CSS 變數 | Konsta UI 屬性 |
|---|---|---|
| 主要 | --f7-theme-color | 主要 |
| 主要深色 | --f7-theme-color-shade | 主要-深色 |
| 主要淺色 | --f7-theme-color-tint | 主要-淺色 |
假設我們的主題顏色是 #ff6b22,我們需要設定以下內容
在 app.css 中 (配置 Framework7 主題顏色)
:root {
  --f7-theme-color: #ff6b22;
  --f7-theme-color-rgb: 255, 107, 34;
  --f7-theme-color-shade: #f85200;
  --f7-theme-color-tint: #ff864b;
}
在 tailwind.config.js 中 (配置 Konsta UI 主題顏色)
const konstaConfig = require('konsta/config');

module.exports = konstaConfig({
  content: ['./src/**/*.{js,jsx,ts,tsx}', './src/index.html'],
  darkMode: 'class',
  // extend primary color
  theme: {
    extend: {
      colors: {
        primary: {
          light: '#ff864b',
          DEFAULT: '#ff6b22',
          dark: '#f85200',
        },
      },
    },
  },
});